1-877-499-7999
Urban Poles/Nordic Walking
Pali urbani per il fitness
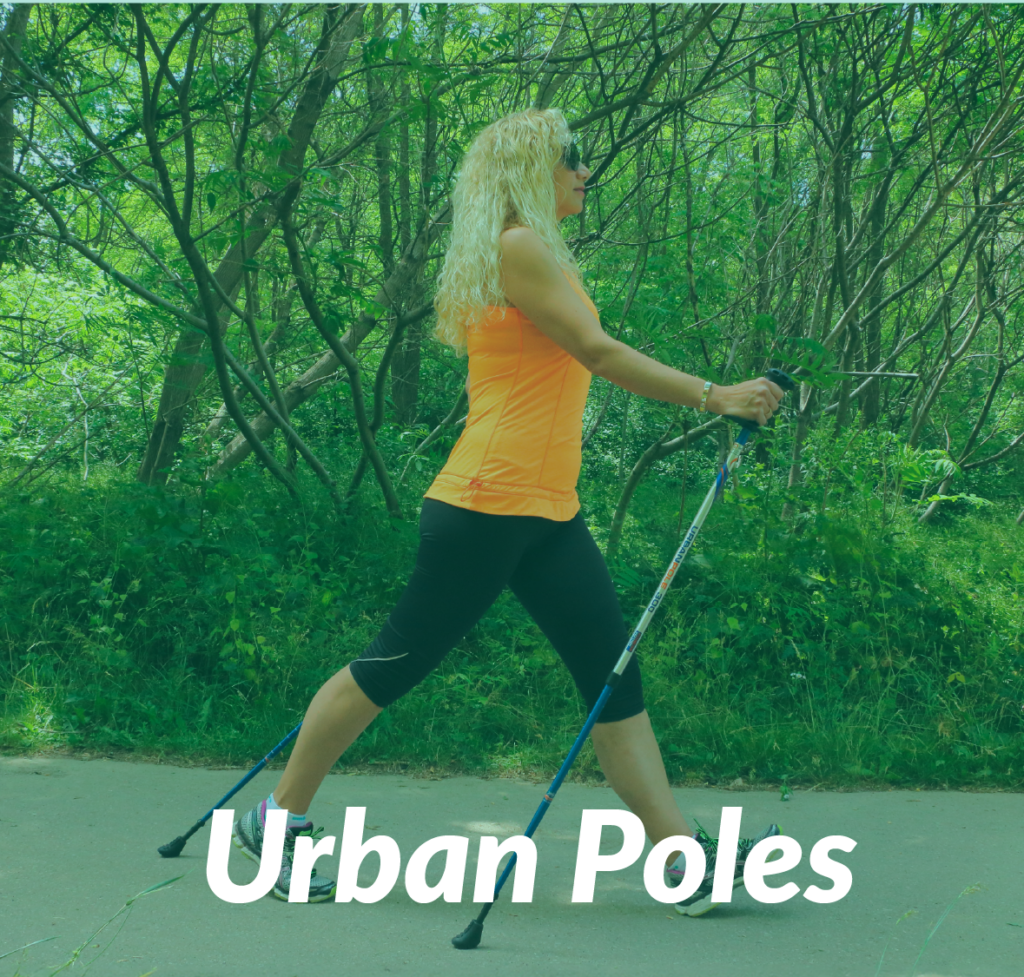
Looking for a more intense workout over regular walking?
The choice is easy: same quality, design and features, all you need to decide on is your colour preference and graphics. Spirit Poles have the distinguishing features of a twist and flip locking system, and snow baskets are included.
Our Urban poles for fitness burn more calories, tone your core while taking pressure off your lower joints. Versatile for indoor and outdoor use including hiking, winter walking & snowshoeing.
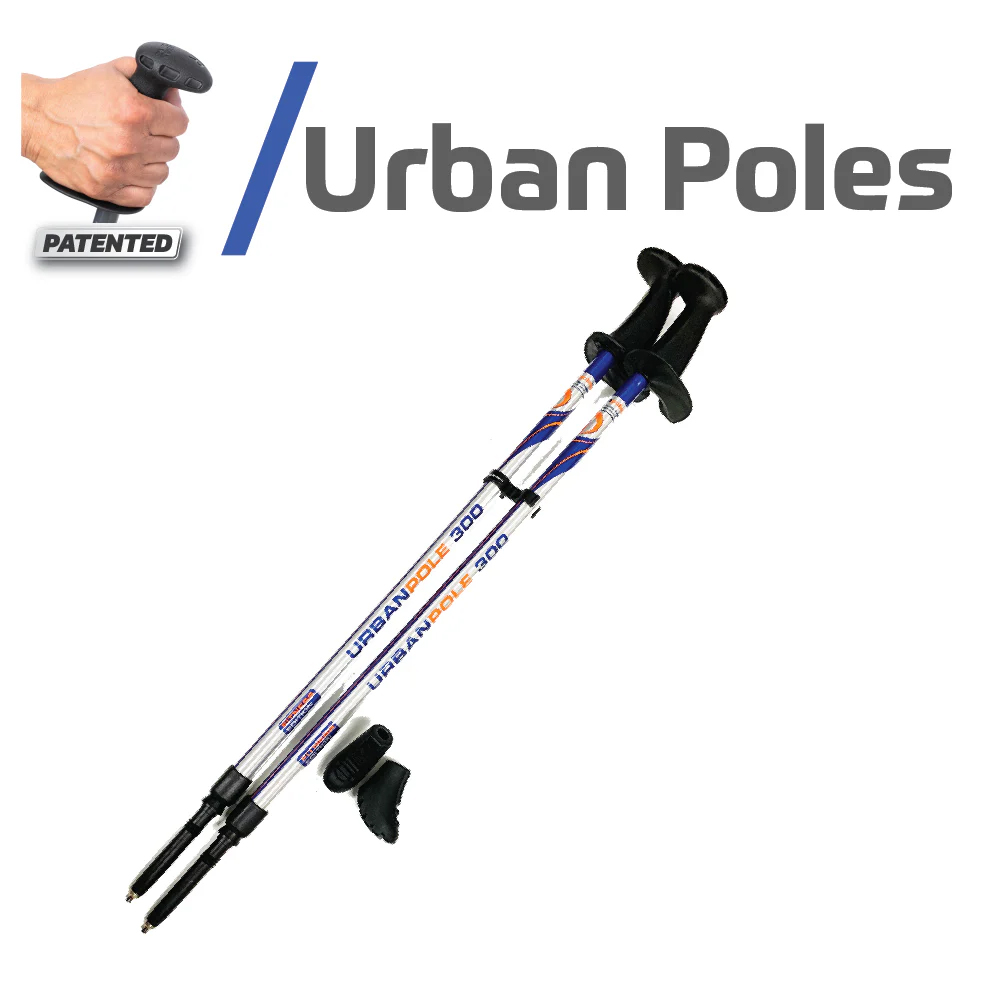
Urban Poles Series 300
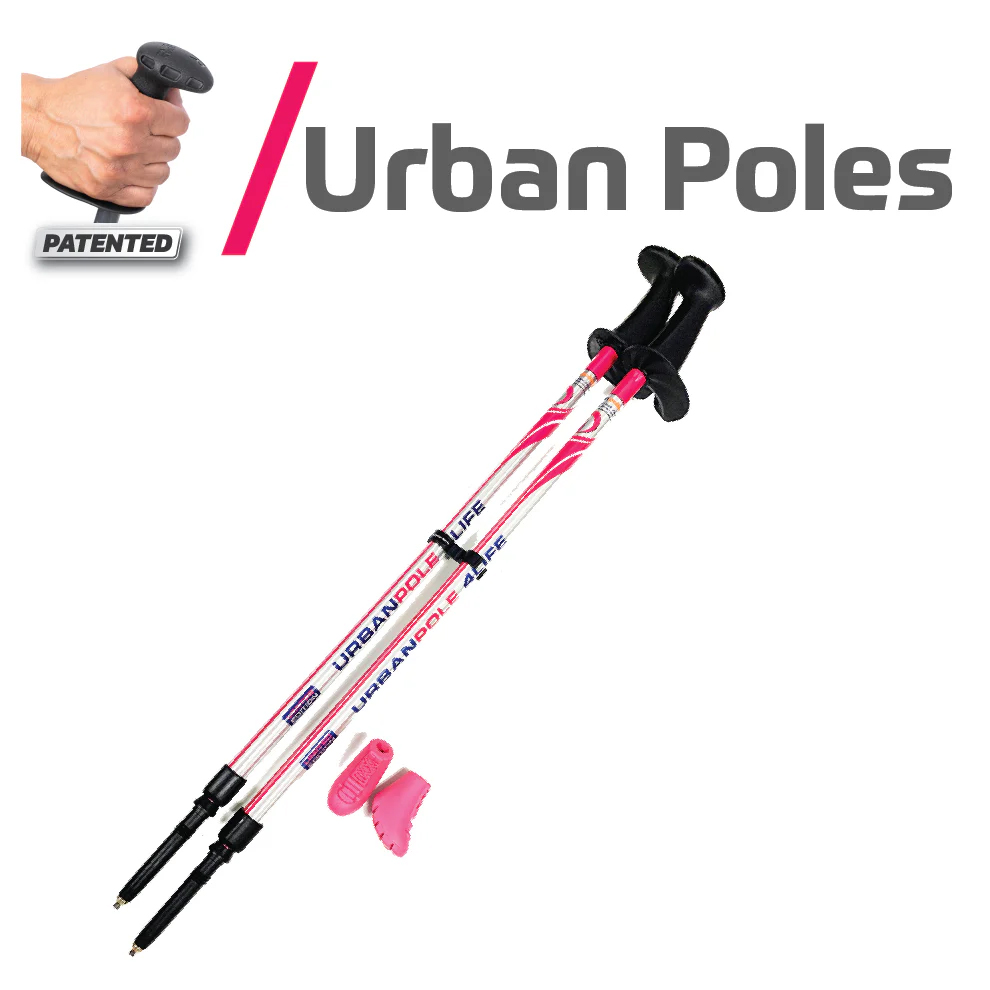
Urban Poles 4Life
Urban Poles Spirit
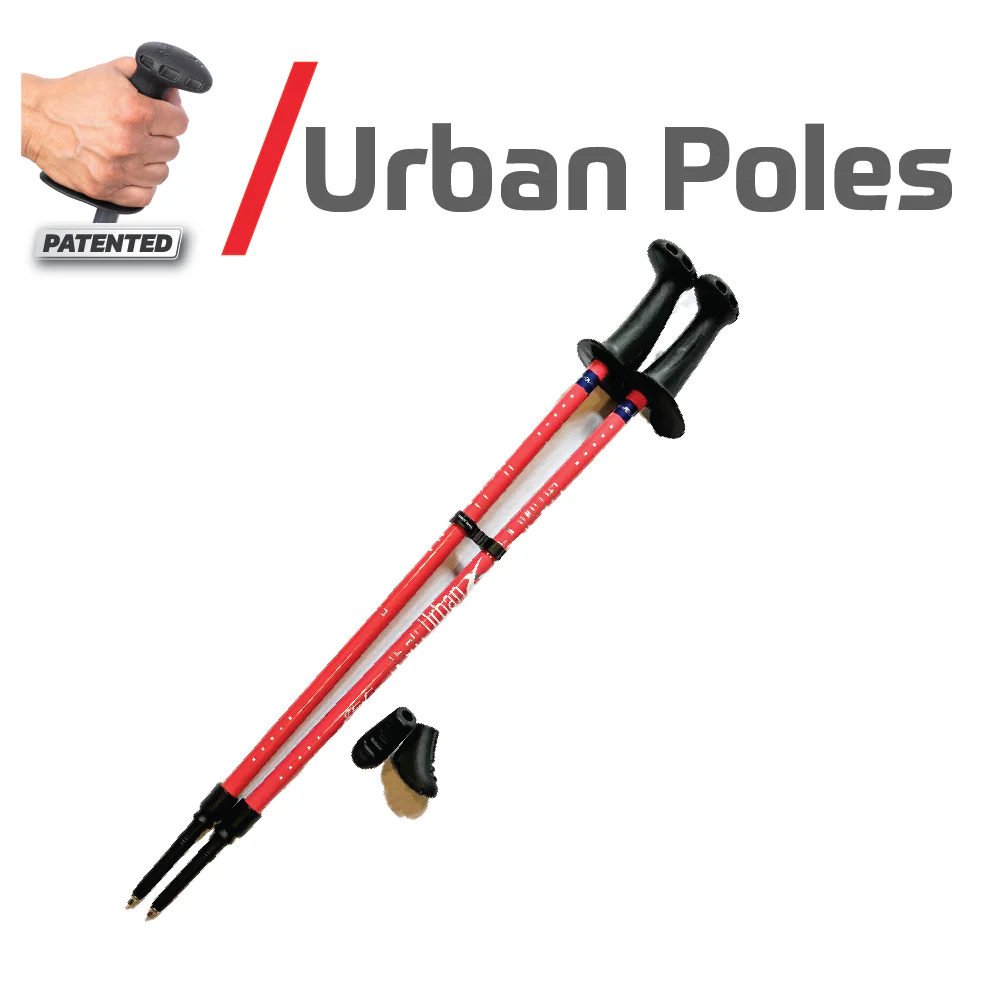
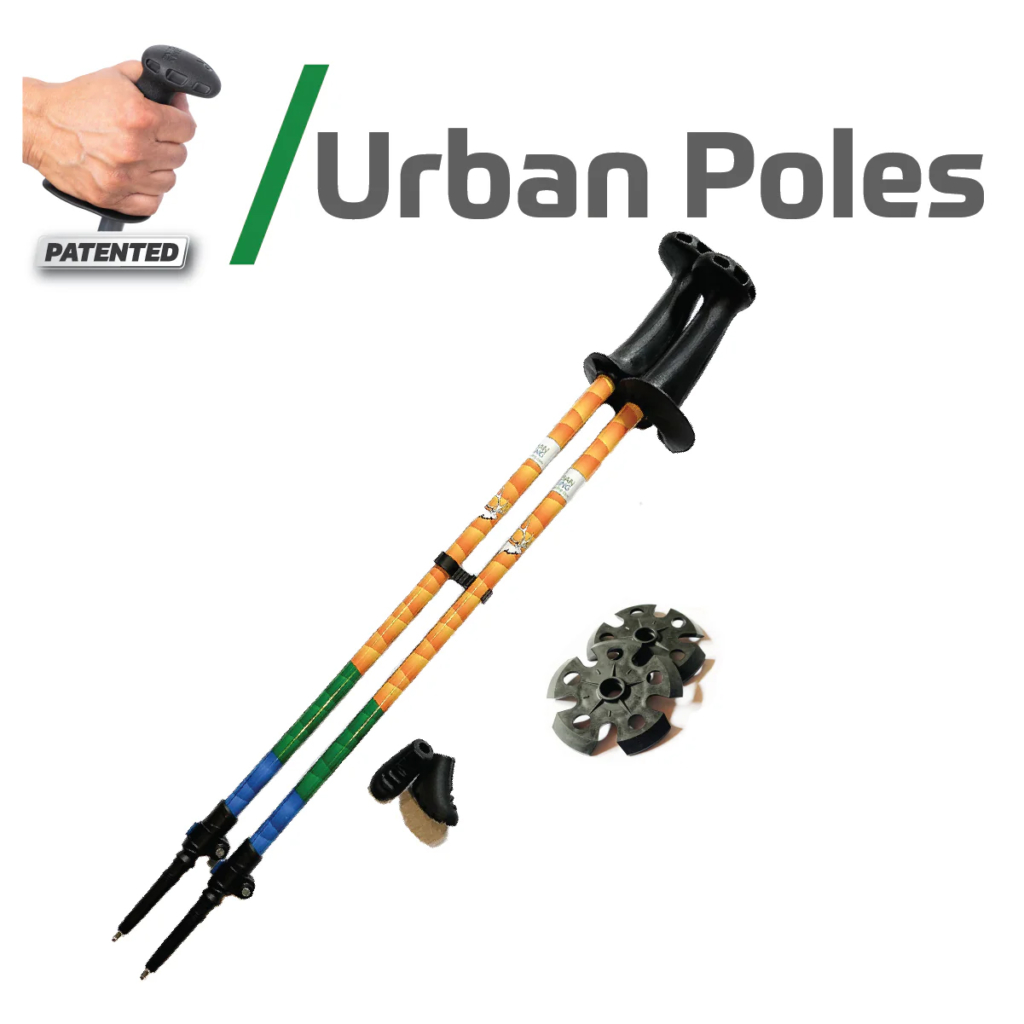
Urban Poles Urban X
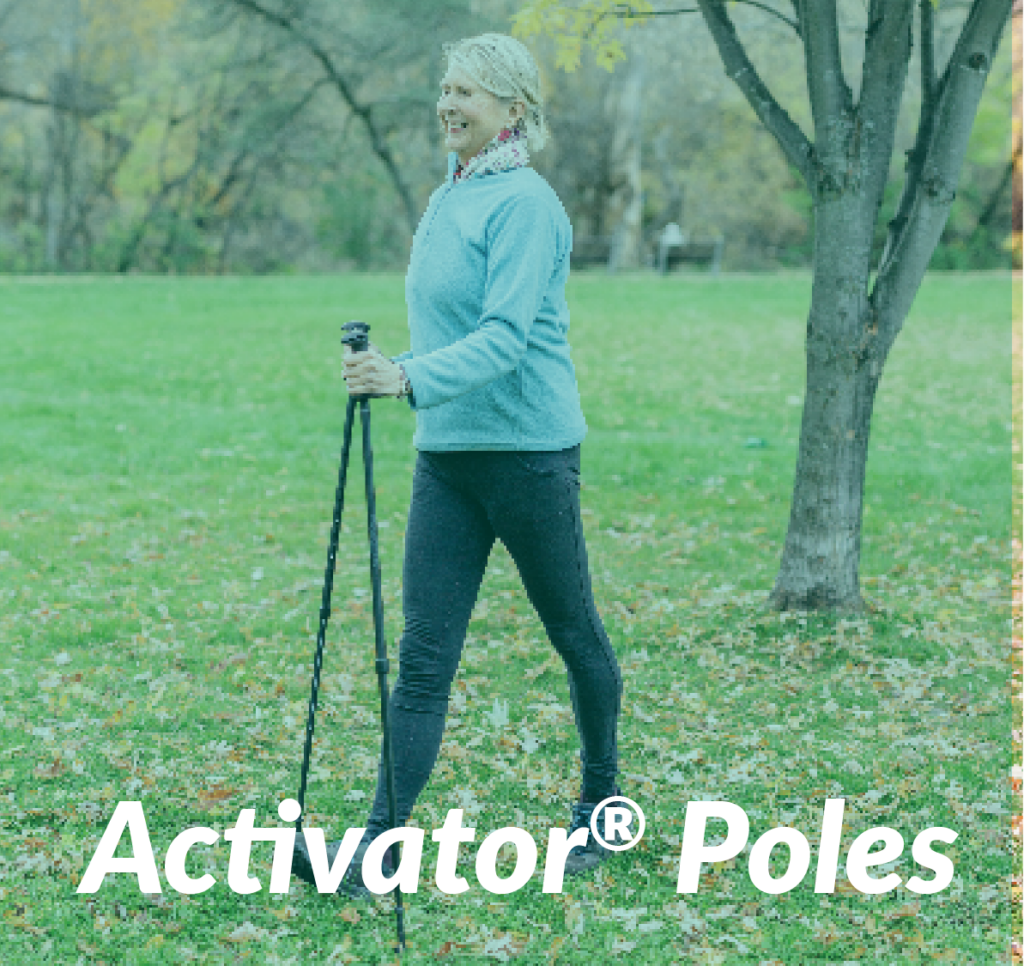
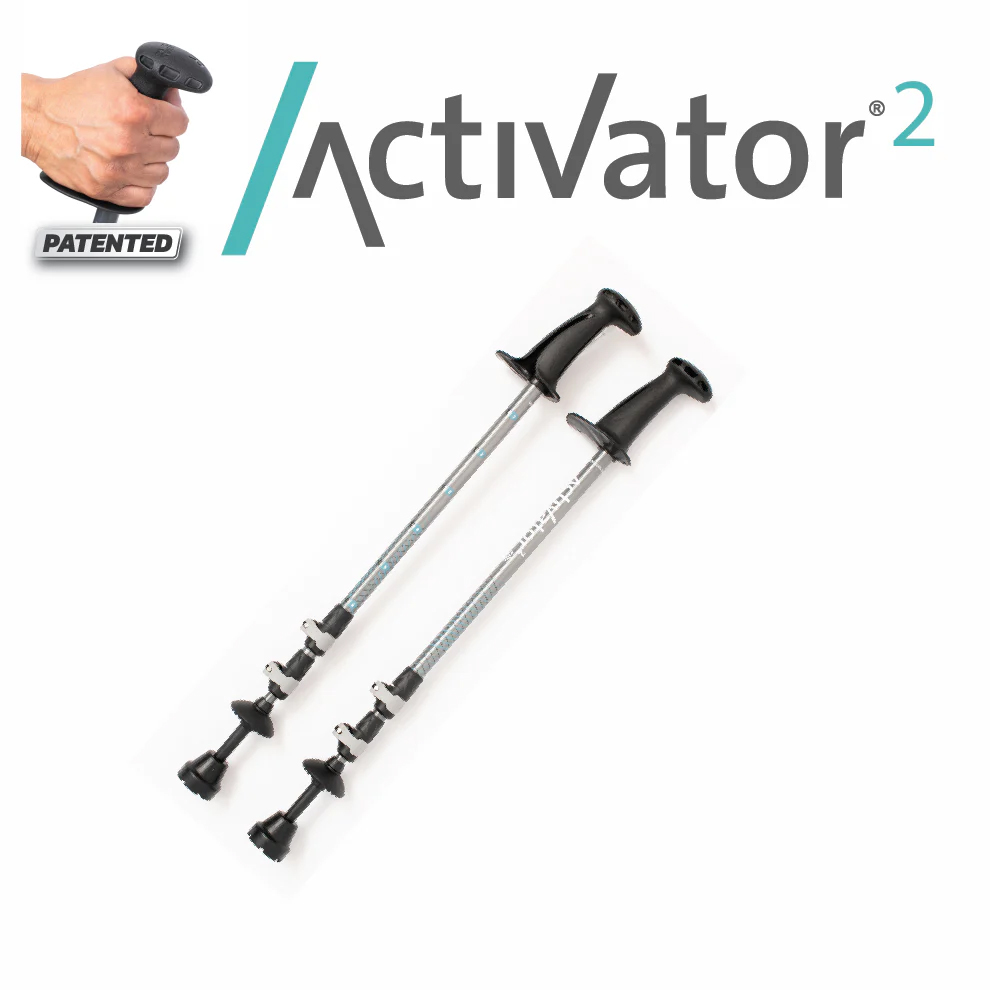
Activator® Poles - Balance and Rehab
ACTIVATOR® Poles for Balance, Hip & Knee Joints with Osteoarthritis and Rehab
The choice is easy: same quality, design and features, all you need to decide on is your colour preference. Just a note that the Moda poles include snow and hiking baskets while the Activator2s distinguishing features are that they can accommodate taller and/or heavier users and collapse to a shorter length.
Adatto per:
- Hip and knee osteoarthritis
- Pre and post hip & knee replacement surgery
- Post spinal stenosis surgery
- Conditions that affect your balance: Parkinson’s, MS, Stroke
- Rehabilitation programs
- Older Adults Programs – Minimizing the Risk for Falls
Ask your doctor or rehab professional if ACTIVATOR® Poles are for you!
Activator® Poles - regular two sectional
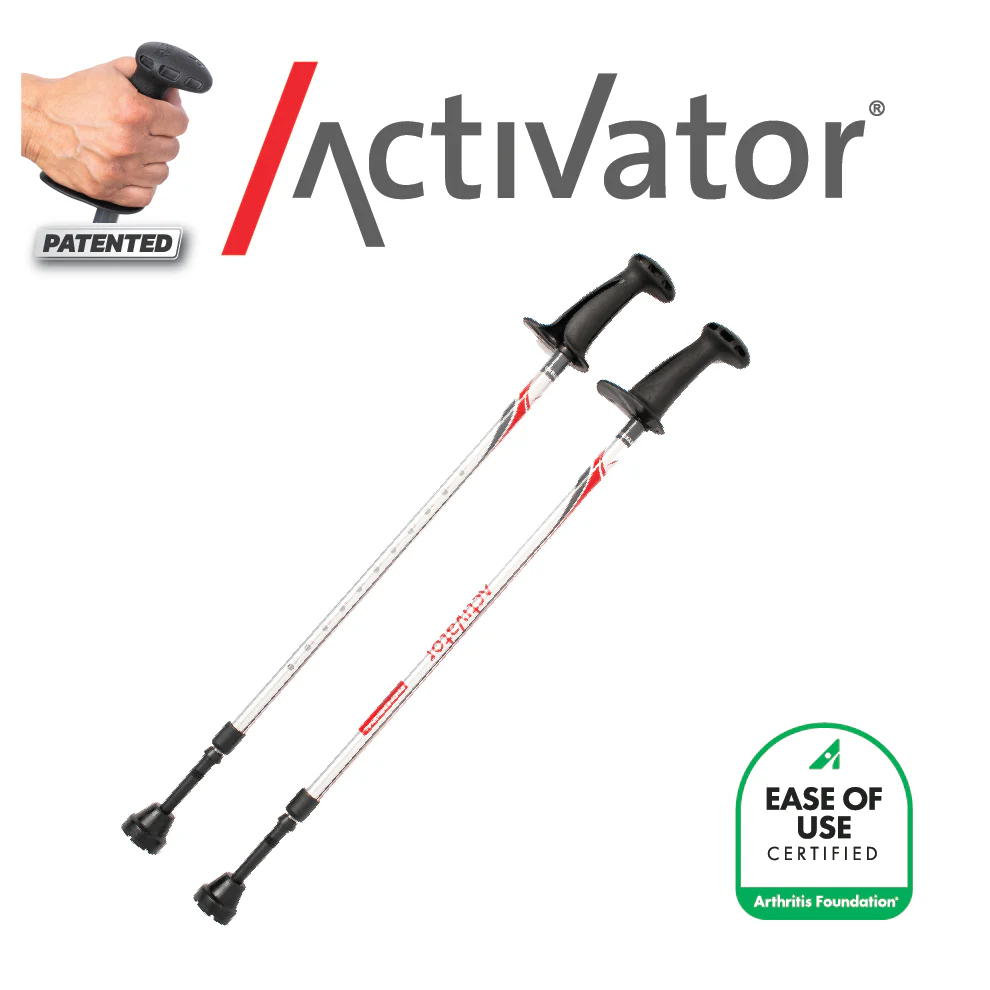
Activator Poles (Silver-Red)

Activator Evening Black
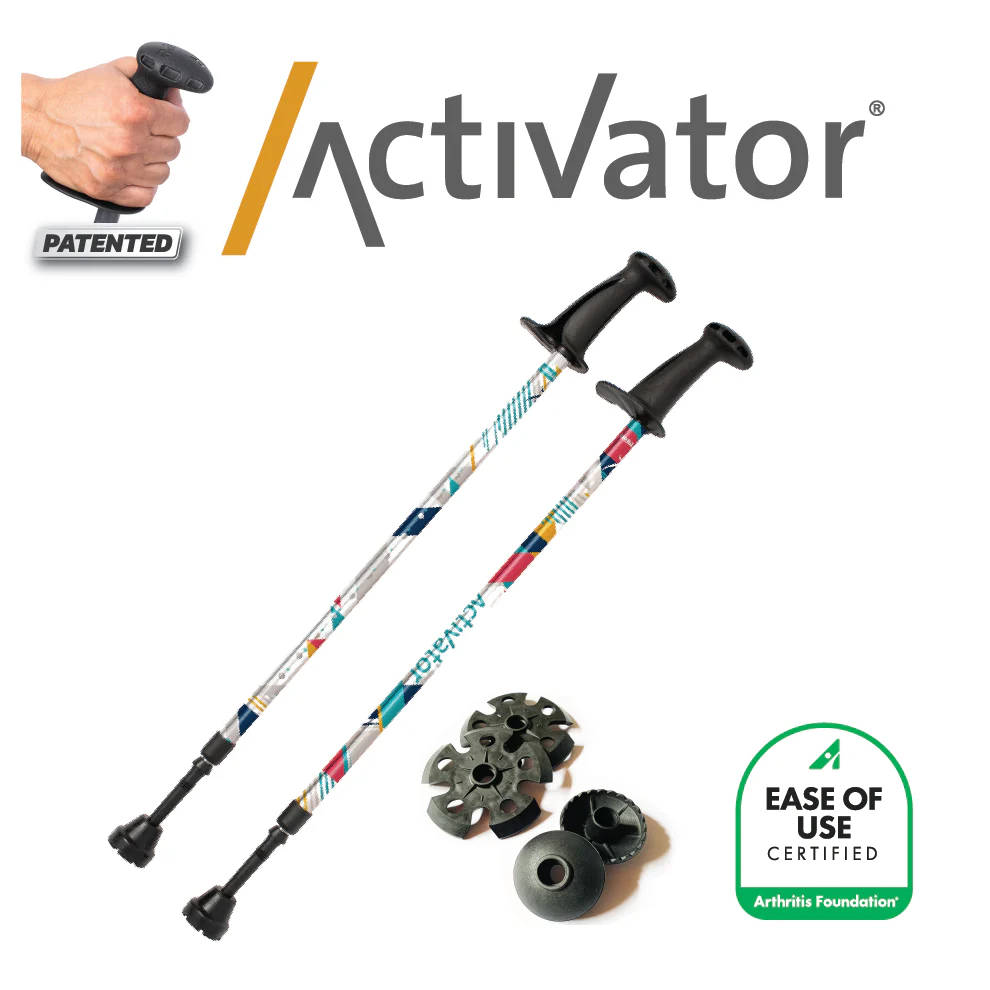
Activator Moda
Unique Components of the ACTIVATOR® Poles:
- Button-Locking System: An easier and safer method than twist locking systems. Up to 200 lbs (90 kg) of weight bearing capacity per pole. Maximum suggested user weight: 250 lbs (113 kg)
- New – Ergonomic CoreGrip (patented): Designed for improving core strengthening while providing greater comfort and supporting the wrist in a neutral position to reduce strain.
- Wide Ledge instead of a Strap: To reduce the risk of injuries. A study by Knobloch et al. (2006) found the highest rate of injury for Nordic walking is when the person is still attached to the poles during a fall.
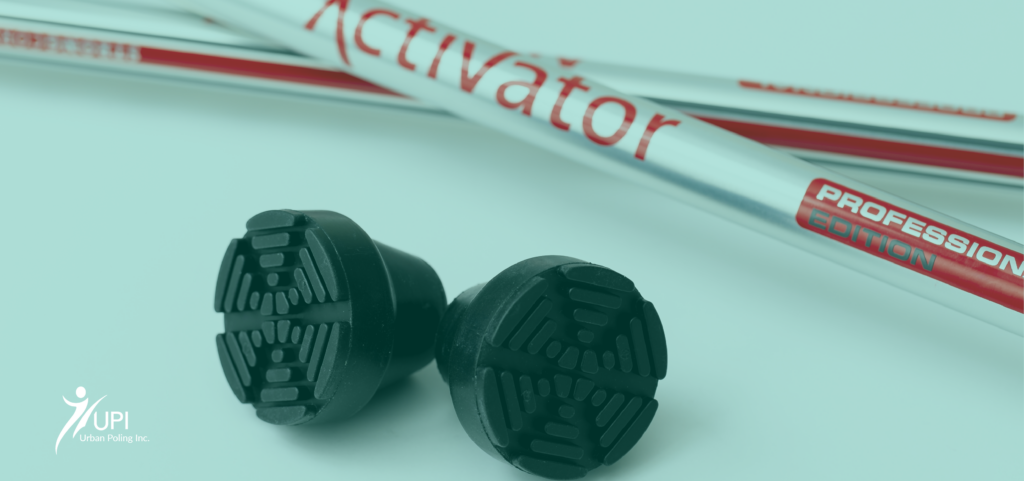
- Bell Shaped Tips: Provide greater stability than boot shaped tips
- 3 Anti-Vibration Features: The handle, ferrule and bell tips help reduce vibration and minimize impact on joints
- Carbide Steel Tip: Provides stability on soft or uneven surfaces such as sand, snow, grass, trails and gravel.
- Telescoping: For users from 4′2” to 6′ (127 to 182 cm). Collapse to 29 inches (73 cm) for storage & travel.
Activator® Poles 2 - special three sectional
Activator 2 Poles
have the same features as above with these differences:
- Button and flip-lock locking system: Up to 225 lbs (102 kg) of weight bearing capacity per pole. Maximum suggested user weight of 320 lbs (145 kg)
- Telescoping: For users from 4′2” to 6′4” (127 to 193 cm). Collapse to 25” (63 cm) for storage & travel
Activator 2 (3 sectional)
Istruzioni per l'Activator
Come impostare i poli di Activator
Come eseguire la tecnica Activator
Activator Technique
- Step 1: Take hold of your poles
Make sure that the CoreGrip (handle) with the letter “R” is in your right hand and the pole CoreGrip with the letter “L” is in your left hand. Hold onto your poles with an easy grip, making sure your hands go all the way around the CoreGrip.
Stand tall and place your elbows at your sides at a 90-degree angle. Ensure the poles are always completely vertical. Keep your elbows bent the entire time you are walking. - Step 2: Begin walking
Step forward with the poles and walk in the same manner as regular walking: swing your right arm forward (with your elbow bent at 90 degrees) as your left foot steps forward. Keep the poles vertical and in front of your body at all times. Be sure that your upper arms swing forward and backward from the shoulders (not elbows) like pendulums. - Fase 3: controllare la postura e la presa
Non stringere troppo le maniglie. Invece, premete sul Ledge con il bordo esterno della mano per impegnare la parte superiore del corpo e i muscoli centrali e per aumentare la stabilità e l'equilibrio. Lo scarico significativo del peso sui bastoncini avviene solo se si applica una forza verso il basso sul Ledge.Important: This technique was developed in conjunction with the specific features of the ACTIVATOR poles. A study by Bechard (2015 unpublished) at UWO found significant off-loading for the knee joint when using the Activator technique.
Suggerimenti rapidi
- Adapt your poles to different terrains & winter! Hidden beneath the rubber boot tip of each pole is a sharp carbide steel tip, which provides increased stability on wet and uneven terrain, such as grass, trails, gravel, sand and snow. This feature allows you to stay active all year round and is an excellent tool for helping to prevent falls in the winter time. You can also purchase snow baskets to keep the poles from sinking into the snow while winter walking or snowshoeing. To attach the baskets, take off the rubber tip and push the basket to the 3 grooves and then rotate the baskets until you achieve a tight fit.
- Using your ACTIVATOR Poles on your travels Collapse your ACTIVATOR Poles to their shortest length 29″ (79 cm) or 25″ (63 cm) for the ACTIVATOR2. They generally will fit in a medium size suitcase by placing them on a diagonal. Durable Urban Poling carrying bags are available to protect poles while in storage and in transit and makes it easy to take your poles with you. You can also use the carrying bag instead of a purse. Take the rubber tip off to expose the carbide tip for walking on trails, beaches and hikes.
- Replace your tips periodicallyYour ACTIVATOR poles come with a high-grade rubber tip for stability, off loading & reduced vibration. Replace your bell shaped tips when the treads wear out, or roughly once a year with regular use.
- Gradually Increase your time
Start by using your poles for only 1/3 of your maximum walking time and gradually increase your distance/time. - Take care of your poles
Store your poles in a dry, moderate-temperature location. You can also purchase a carrying bag for travel or storage.
Prima di utilizzare i bastoncini ACTIVATOR, leggere attentamente la guida per l'utente e le precauzioni elencate (la guida viene fornita con i bastoncini).
Pali ACTIVATOR
Did you know that there are 19 current/recent studies on the ACTIVATOR® Poles at hospitals and universities across Canada and at the renowned Royal National Orthopedic Hospital in the UK? Benefits may include improved core strength, posture, balance, improved confidence for walking; reduced impact on hips and knees and increased endurance! Health Care Professionals are recommending the ACTIVATOR® Poles for rehab and many conditions because they were designed by an Occupational Therapist & Gerontologist and have eight unique features for increasing safety, performance and stability. We hope you enjoy the ACTIVATOR Poles that have been built for walking and active living!
Unique Components of the ACTIVATOR® Poles:
- Button-Locking System: An easier and safer method vs turning locking systems. 200 lbs (90 kg) of weight bearing capacity per pole. Maximum suggested weight of user: 250 lbs (113 kg)
- New – Ergonomic CoreGrip (patented): Designed for improving core strengthening while providing greater comfort and supporting the wrist in a neutral position to reduce strain.
- Wide Ledge instead of a Strap: To reduce the risk of injuries. A study by Knobloch et al. (2006) found the highest rate of injury for Nordic walking is when the person is still attached to the poles during a fall.
- Bell Shaped Tips: Provide greater stability than boot shaped tip
- 3 Anti-Vibration Features: Reduce vibration and impact on joints
- Carbide Steel Tip: Provides stability on slippery conditions and on trails & beaches.
Telescoping: 4′ to 6′ (121 to 182 cm). Poles are collapsible for storage & travel - New – ACTIVATOR2 Poles designed for taller individuals up to 6′ 4″ (195 cm) and collapses shorter for travel 25″ (63 cm). Maximum user weight: 325 lbs (147 kg).
Regolazione dei bastoncini ACTIVATOR
- Quando si ricevono i bastoncini per la prima volta, è necessario regolarli in base alla propria altezza.
- Step 1: Stand tall with your poles upright and relax your arms so that your elbows rest at a 90-degree angle. This is the correct pole length for your height.
- Step 2: Notice the perforated holes on the top portion of the pole. Pull the bottom portion of the pole downward and turn it until the silver stripe lines up with the holes. Continue to pull down on the lower part of the pole until the button pops into the correct hole for your height. You may need to adjust the pole slightly up or down before the button locks securely into place.
Regolazione dei bastoni ACTIVATOR® 2
- Extend poles: Open both flip-locks tabs (grey). Pull below flip-lock to extend the middle and lower sections. Lower section may be stiff to pull initially.
- Set pole length: Adjust the pole length so that you can stand with your elbow bent at slightly less than a 90 degree angle with your hand resting on the ledge of the CoreGrip and the bell tip resting on the ground.
- Secure button lock A-B: Looking at holes A and B in the middle section, turn the lower section of the pole until you see the white stripe in the holes marked A and B. Pull on the lower section of the pole until the button locks into hole A or B.
- Secure button lock 1-6: Repeat above securing the button lock in one of the holes marked 1-6 (depending on appropriate level for your height) in the upper section. Confirm pole length and close flip-lock tabs. Collapsing: open the flip-lock tab, push the button lock and at the same time push in the section Close flip-lock tab.
Come regolare l'Activator® 2
Precauzioni:
Consultare il proprio medico curante (medico, terapista o altro) prima di utilizzare i bastoncini se attualmente si utilizzano bastoni, stampelle o deambulatori; per l'allenamento; o per qualsiasi condizione medica che influisca sull'equilibrio, sulla stabilità, sulla capacità di afferrare le impugnature, sulla vista, sulla percezione della profondità o sulla coordinazione; o se ci si sta riprendendo da un infortunio o da un intervento chirurgico.
- DO NOT use the ACTIVATOR Poles on stairs unless trained by a therapist or other health care professional.
- ACTIVATOR Poles should not be used on ice.
Always use both poles (except for people with strokes), unless advised otherwise by your healthcare professional. - ACTIVATOR Poles may help to prevent or break a fall, but falling on them may affect pole integrity. Do not use poles that have been fallen on or that have been damaged in any other way.
- Replace your poles approximately every 2 years if you are over 200 lbs (90 kg) or a heavier user. Use exceeds more than 5-10 km per week.
- Ask your therapist how to use the poles for transferring out of the car and use both poles.
Introduzione all'Urban Poling
Siete curiosi di conoscere l'allenamento con il bastone da passeggio? L'urban poling (noto anche come nordic walking) - pensate allo sci di fondo senza gli sci - ha effetti tonificanti, brucia-calorie e benefici sulla postura che lo hanno reso popolare in Europa per decenni e un nuovo allenamento preferito in Canada. Basta prendere i bastoncini e partire, senza bisogno di un costoso abbigliamento in spandex o di un abbonamento a una palestra di lusso!
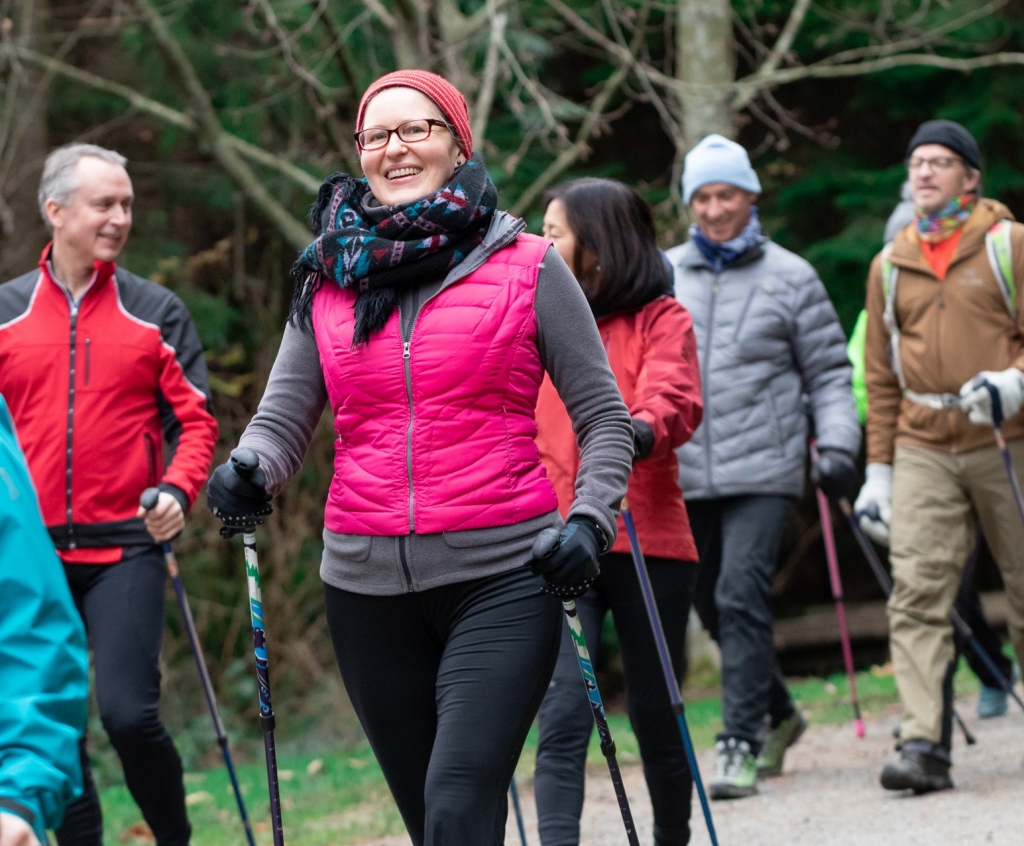
Ecco altri 10 motivi per provare il poling urbano.
- 1. Riduce il girovita - Gli addominali si stringono ogni volta che si spinge il bastone. È l'equivalente di 1.000 contrazioni addominali ogni chilometro o 1.800 ogni chilometro!
- 2. Le ginocchia e le anche vi ringrazieranno - I bastoncini vi permettono di scaricare il peso dalle anche e dalle ginocchia alla parte superiore del corpo. Potrete camminare più a lungo, più velocemente o addirittura senza dolore.
- 3. Aumenta la combustione delle calorie - Le ricerche lo dimostrano più volte: il poling urbano fa bruciare fino al 20-46% di calorie in più rispetto alla normale camminata. Wow!
- 4. Scolpisce le braccia e le spalle - L'urban poling utilizza il 75% dei muscoli, soprattutto quelli inferiori. Ciao maniche corte!
- 5. Aiuta a bilanciare gli zuccheri nel sangue - L'allenamento completo di urban poling aiuta a mantenere gli zuccheri nel sangue in un range sano.
- 6. I muscoli della parte superiore della schiena (quelli che tirano indietro le spalle) si tendono ogni volta che si piantano i bastoncini e si preme sulle impugnature ergonomiche.
- 7. È un allenamento sociale divertente: invitate i vostri amici, i vostri genitori e i vostri figli a godere di tutti i benefici per la salute insieme a voi.
- 8. È un incredibile antistress - L'azione ritmica e fluida distrae dalle preoccupazioni quotidiane e risolleva l'umore.
- 9. È possibile regolare l'intensità - L'urban poling è un'attività energizzante che può essere praticata da persone di qualsiasi età e capacità atletica. Basta premere sulle maniglie ergonomiche con maggiore o minore intensità per modificare il ritmo.
- 10. È un'ottima alternativa alla corsa - Percorrete i sentieri o i marciapiedi del vostro quartiere da soli o con un gruppo di amici. Il poling urbano offre per tutto l'anno la stessa esperienza di corsa all'aria aperta, ma senza stridere con le articolazioni.
Come installare i pali urbani
Serie 300, 4Life e UrbanX.
Come eseguire la tecnica dell'Urban Poling
Serie 300, 4Life, UrbanX e Spirit Poles
Regolazione dei pali
Quando si ricevono i bastoni per la prima volta, è necessario regolarli in base alla propria altezza. I bastoncini sono dotati di un sistema di bloccaggio a torsione interno che può sopportare fino a 41 kg di pressione diretta per ogni bastoncino. Peso massimo consigliato per l'utente: 102 kg. Sulla parte inferiore dei bastoncini sono presenti delle indicazioni che vanno da 4′-2" a 6′-2″ (da 128 a 189 cm). Se siete alle prime armi o se siete alle prime armi con il poling, potreste trovare più facile iniziare con bastoncini che sono impostati 5 cm al di sotto della vostra altezza.
Fase 1: individuare la scritta "lock/unlock" sulla sezione inferiore dell'asta. Posizionare la mano sinistra sulla sezione superiore dell'asta e la mano destra vicino alla parte inferiore dell'asta. Ruotare solo la sezione inferiore in posizione di "sblocco". Non toccare la ghiera di plastica nera nella sezione centrale dell'asta: si tratta di una funzione anti-vibrazione.
Fase 2: dopo aver regolato l'asta all'altezza desiderata, serrarla nuovamente ruotando solo la parte inferiore dell'asta verso la posizione di "blocco". Assicurarsi sempre che le aste siano ben bloccate prima dell'uso. Non tirate mai le aste e non bloccatele oltre la scritta "Max" o "Stop".
Fase 3: assicurarsi che la "punta" dello stivale sia rivolta alle spalle o nella direzione opposta a quella in cui si cammina.
Come impostare i pali degli spiriti
Come aggiungere cestini da neve ai pali urbani
Tecnica di poling urbano
Prima di iniziare, assicurarsi di regolare la lunghezza dell'asta alla giusta altezza.
Fase 1: Notate come camminate in modo naturale
Fate qualche passo in avanti senza i bastoncini (o tenendo i bastoncini nella parte centrale) e fate oscillare le braccia come se steste camminando. Notate che il braccio si muove naturalmente in avanti contemporaneamente alla gamba opposta.
Fase 2: Trascinare i pali
Impugnate i bastoni, assicurandovi che il CoreGrip con la lettera "R" sia nella mano destra e il CoreGrip con la lettera "L" nella mano sinistra. Afferrate le impugnature dei bastoncini in modo lasco, con le braccia completamente rilassate lungo i fianchi. Con le braccia lungo i fianchi e trascinando i bastoncini dietro di voi, iniziate a camminare. A ogni passo, le braccia oscillano naturalmente prima davanti e poi dietro il corpo.
Fase 3: oscillare il braccio in posizione di stretta di mano
Mentre continuate a camminare e a trascinare i bastoncini, iniziate a far oscillare le braccia più in avanti fino a portarle allo stesso livello di una stretta di mano alta. Se vi risulta difficile, accorciate la lunghezza dei bastoncini. A questo punto, dovreste sentire le punte dei bastoncini che toccano il terreno dietro di voi a ogni passo.
Fase 4: Premere verso il basso e spingere verso il basso
Mentre si piantano i bastoncini, esercitare una pressione verso il basso sulla sporgenza del CoreGrip e sentire che il corpo viene spinto in avanti dai bastoncini. Infine, quando il braccio oscilla in avanti fino alla posizione di stretta di mano alta, sollevarsi leggermente per consentire ai bastoncini di staccarsi dal suolo.
Continuate a fare Urban Poling tutto l'anno!
Godetevi i vostri Urban Poles tutto l'anno con le passeggiate invernali e le ciaspolate! È possibile acquistare anche accessori per i bastoncini della Serie 300, 4Life o Spirit e per i bastoncini ACTIVATOR: cestini da neve per le passeggiate invernali e cestini da trekking per le escursioni.
Parte 1: Le basi
Suggerimenti rapidi
Afferrare leggermente le maniglie
Le impugnature ergonomiche CoreGrip sono progettate per essere impugnate con leggerezza. Cercate sempre di mantenere una presa rilassata (con le dita intorno alle impugnature) per ridurre la tensione inutile nelle mani. L'allenamento deriva da una spinta verso il basso sul bordo del CoreGrip mentre si oscilla il braccio all'indietro per impegnare i muscoli del core.
Adattate i vostri bastoni a diversi terreni
Sotto la punta dello stivale in gomma di ogni bastone si nasconde un'affilata punta in acciaio al carburo, che garantisce una maggiore stabilità su terreni bagnati e irregolari, come erba, ghiaia, sabbia e neve. È un ottimo strumento per prevenire le cadute in inverno.
Sostituire periodicamente le punte
I vostri bastoncini da fitness Urban Poling sono dotati di una punta in gomma di alta qualità per migliorare la trazione, aumentare la velocità e ridurre le vibrazioni. Sostituite le punte degli scarponi quando il battistrada si consuma, o all'incirca ogni sei mesi o ogni anno, a seconda della frequenza di utilizzo.
Utilizzare i bastoncini a temperature molto basse
Se si utilizzano i bastoni a temperature inferiori allo zero, posizionarli all'esterno per 10-15 minuti in modo che si adattino alla temperatura. Quindi bloccarli all'altezza desiderata.
Trucco per sbloccare i pali
Le aste sono dotate di un eccellente sistema di bloccaggio, ma le prime volte le aste nuove potrebbero essere difficili da sbloccare. Provate a farlo: Capovolgere i bastoncini e tenere l'impugnatura stretta tra i piedi. Quindi, usando due mani, ruotate bruscamente la parte inferiore in direzione dello "sblocco".
Prendetevi cura dei vostri pali
Conservare i bastoncini in un luogo asciutto e a temperatura moderata. Non utilizzare mai lubrificanti di alcun tipo. È inoltre possibile acquistare la nostra borsa per il trasporto, unica ed elegante, per viaggiare e conservare i bastoncini.
Precauzioni:
Consultare il proprio medico o terapista prima di utilizzare i bastoncini se si utilizza attualmente un bastone o un deambulatore, se si è affetti da patologie che compromettono l'equilibrio, la stabilità, la forza di presa, la vista, la percezione della profondità, la capacità di giudizio o la coordinazione o se ci si sta riprendendo da un infortunio o da un intervento chirurgico.